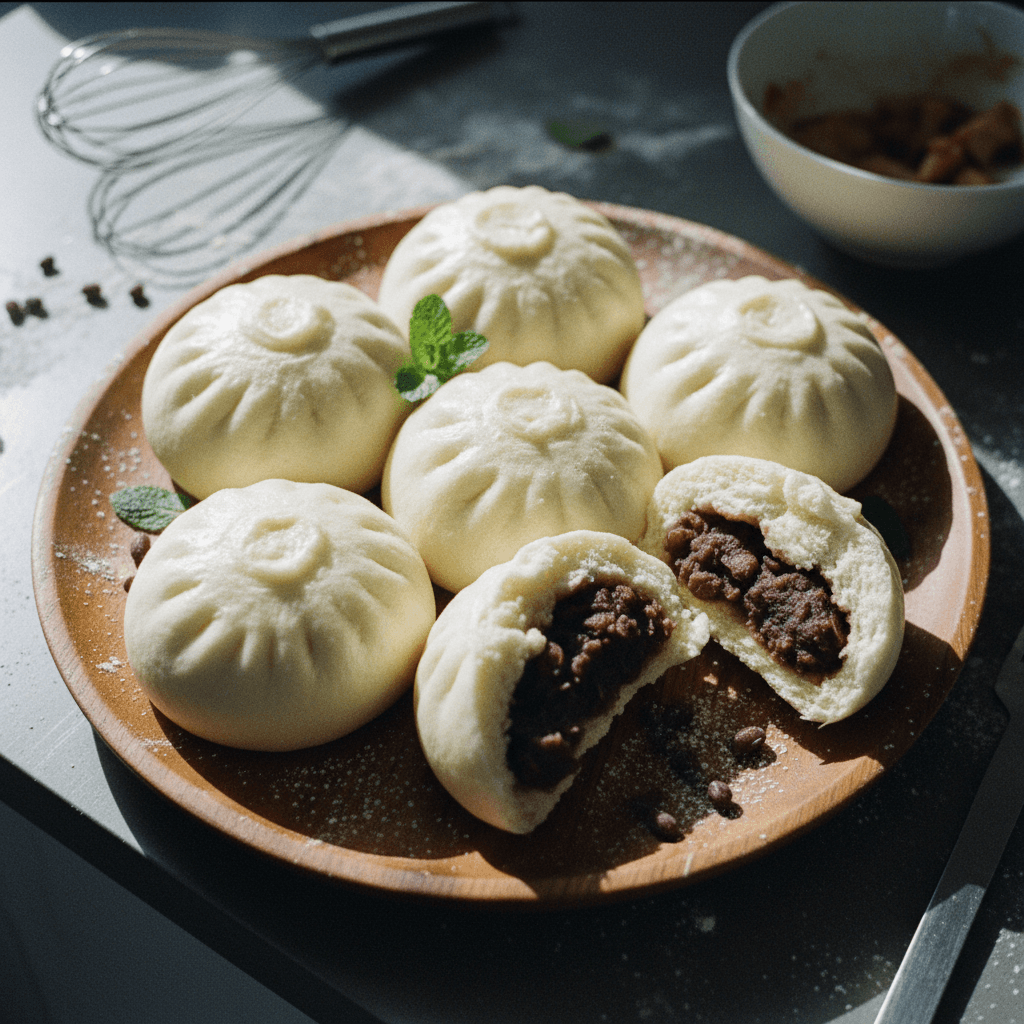
Sweet Azuki Bean Bao (Steamed Red Bean Buns)
Sweet Azuki Bean Bao (Steamed Red Bean Buns)
Ingredients
For the Dough
- 1/2 cup oat milk, warmed to 105-115°F
- 2 tablespoons granulated sugar
- 2 1/4 teaspoons active dry yeast
- 2 cups all-purpose flour
- 1 teaspoon baking powder
- 2 tablespoons vegetable oil
For the Filling
- 1 cup sweet azuki bean paste, store-bought or homemade
For Steaming
- 4 parchment paper, cut into squares or circles to fit steamer
Instructions
- 1
In a large mixing bowl, combine the warmed oat milk, granulated sugar, and active dry yeast. Stir gently and let the mixture sit for 10 minutes until small bubbles form on the surface, indicating the yeast is active.
⏱️ 10 min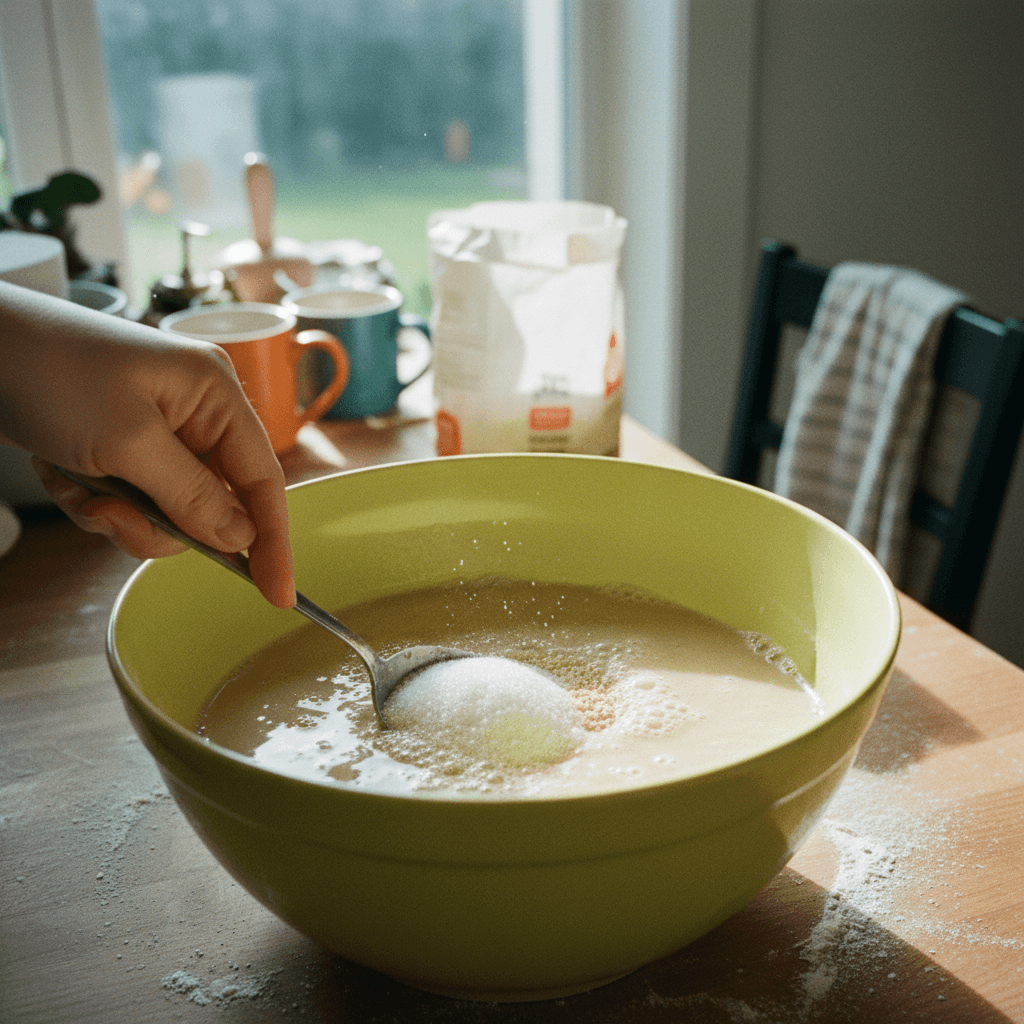
- 2
To the activated yeast mixture, add the all-purpose flour and baking powder. Mix briefly with a spoon or spatula until just combined. Then, add the vegetable oil and mix again until the ingredients roughly come together to form a shaggy dough.
⏱️ 5 min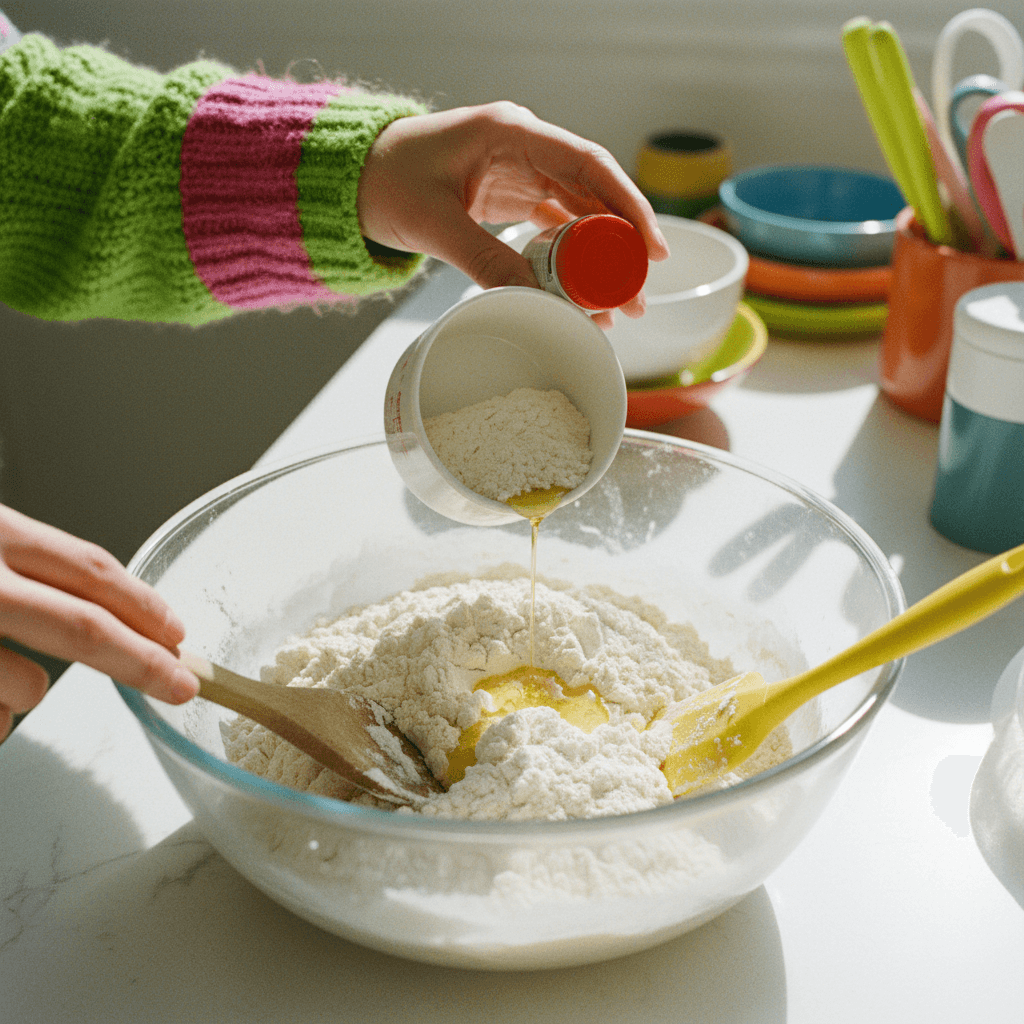
- 3
Transfer the dough to a lightly floured clean work surface. Knead the dough thoroughly for 8-10 minutes until it becomes smooth and elastic. It should spring back when gently poked.
⏱️ 10 min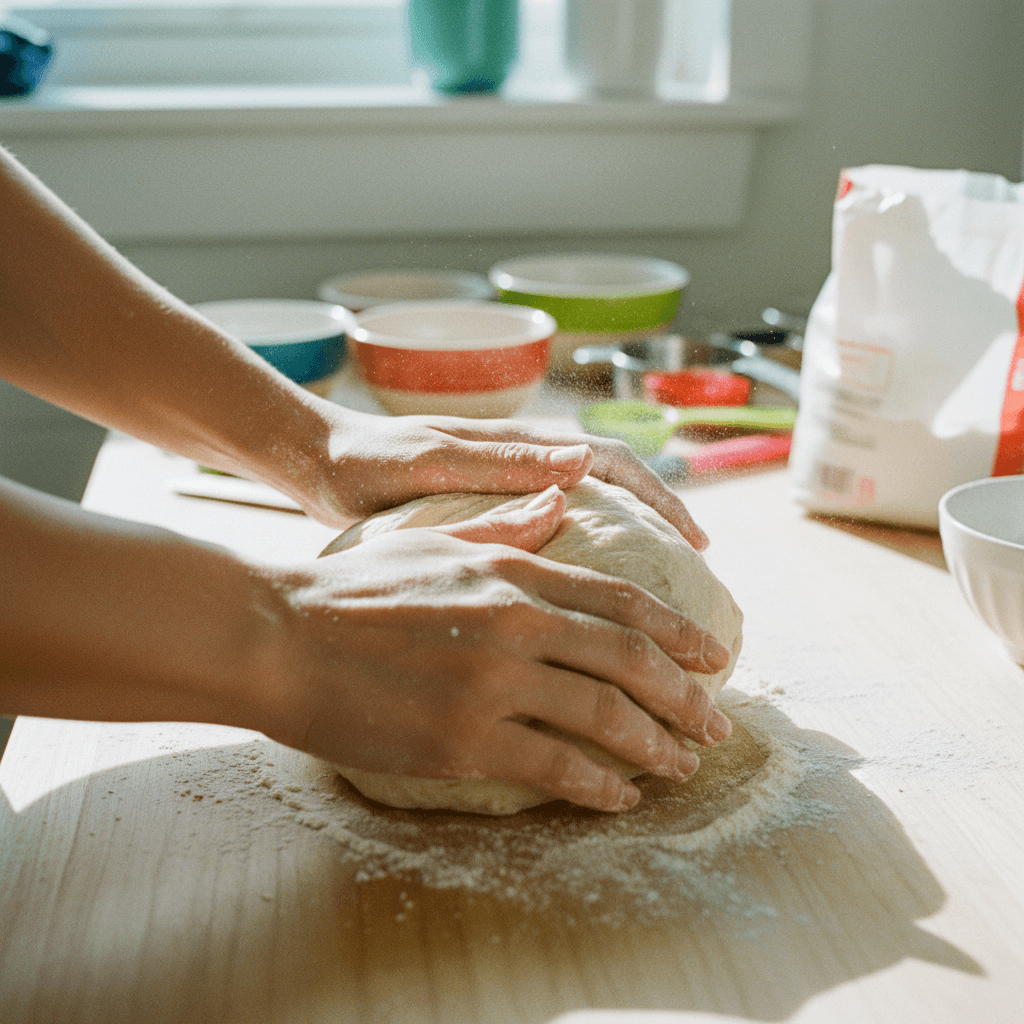
- 4
Lightly grease the mixing bowl. Place the kneaded dough back into the bowl, cover it with a clean kitchen towel or plastic wrap, and set it aside in a warm place. Allow it to proof for 45-60 minutes, or until it has doubled in size.
⏱️ 60 min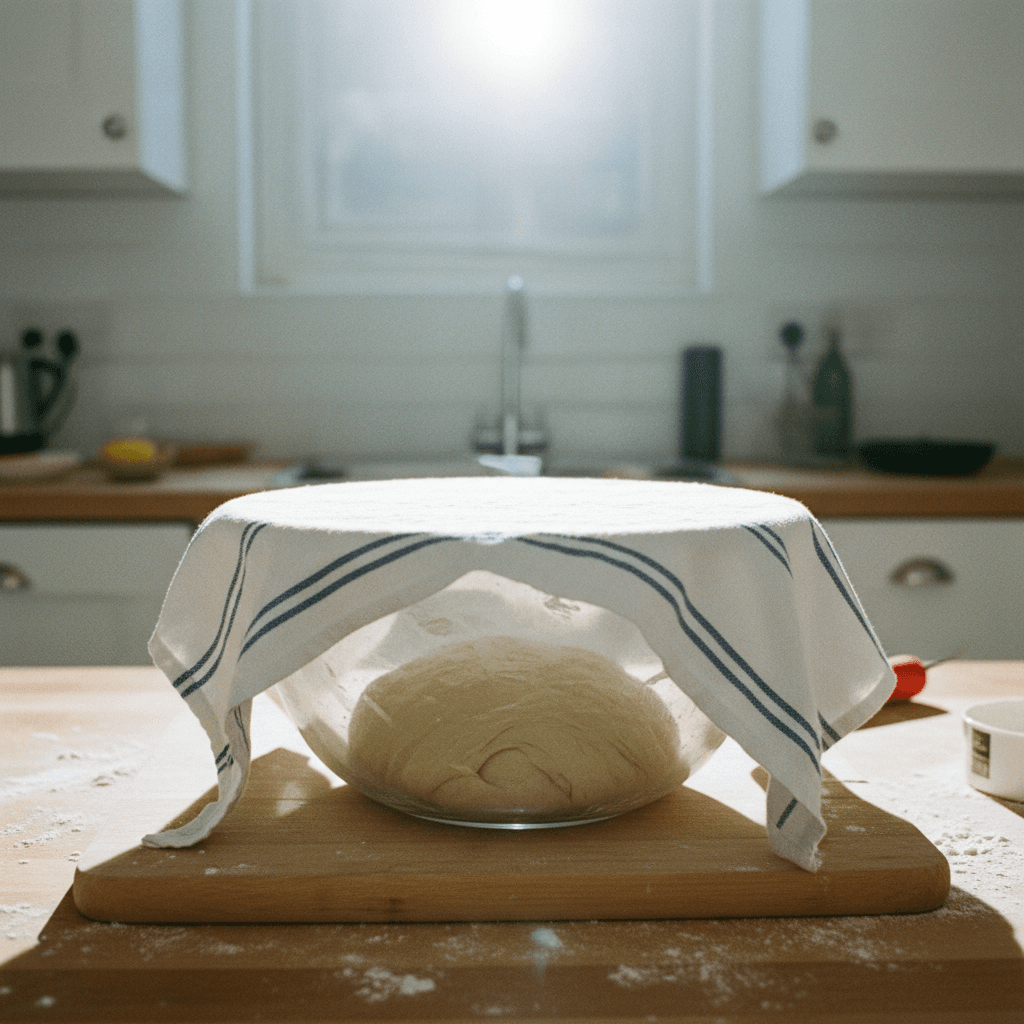
- 5
Once the dough has risen, gently punch it down to release the accumulated air. Transfer it back to the work surface and knead it briefly for 1-2 minutes to further develop its texture and remove any large air pockets.
⏱️ 2 min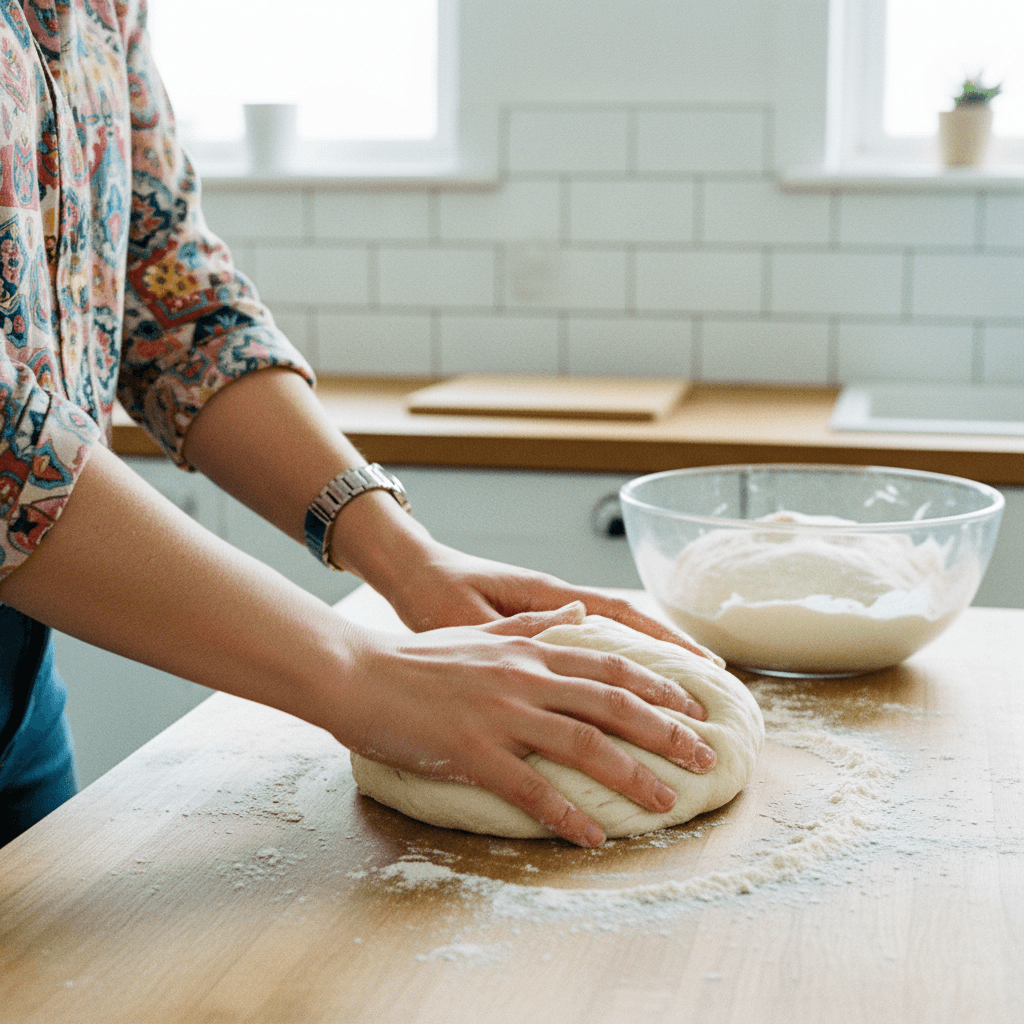
- 6
Roll the dough into a long, cylindrical rope, approximately 1 1/2 to 2 inches in diameter. Divide this rope into 4 equal small chunks by hand or with a dough cutter.
⏱️ 3 min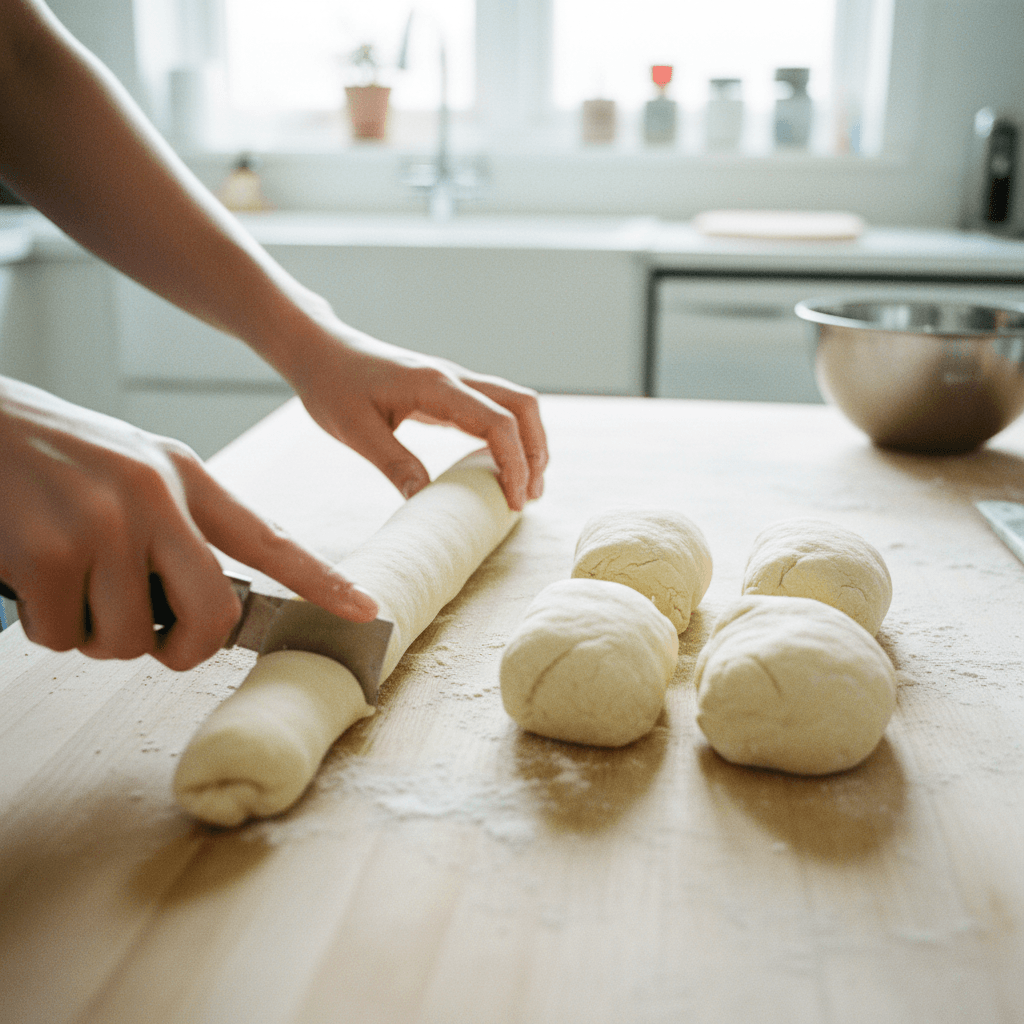
- 7
Take each small dough chunk and knead it individually for a few seconds to form a smooth, round ball. Place these dough balls on a lightly floured surface.
⏱️ 2 min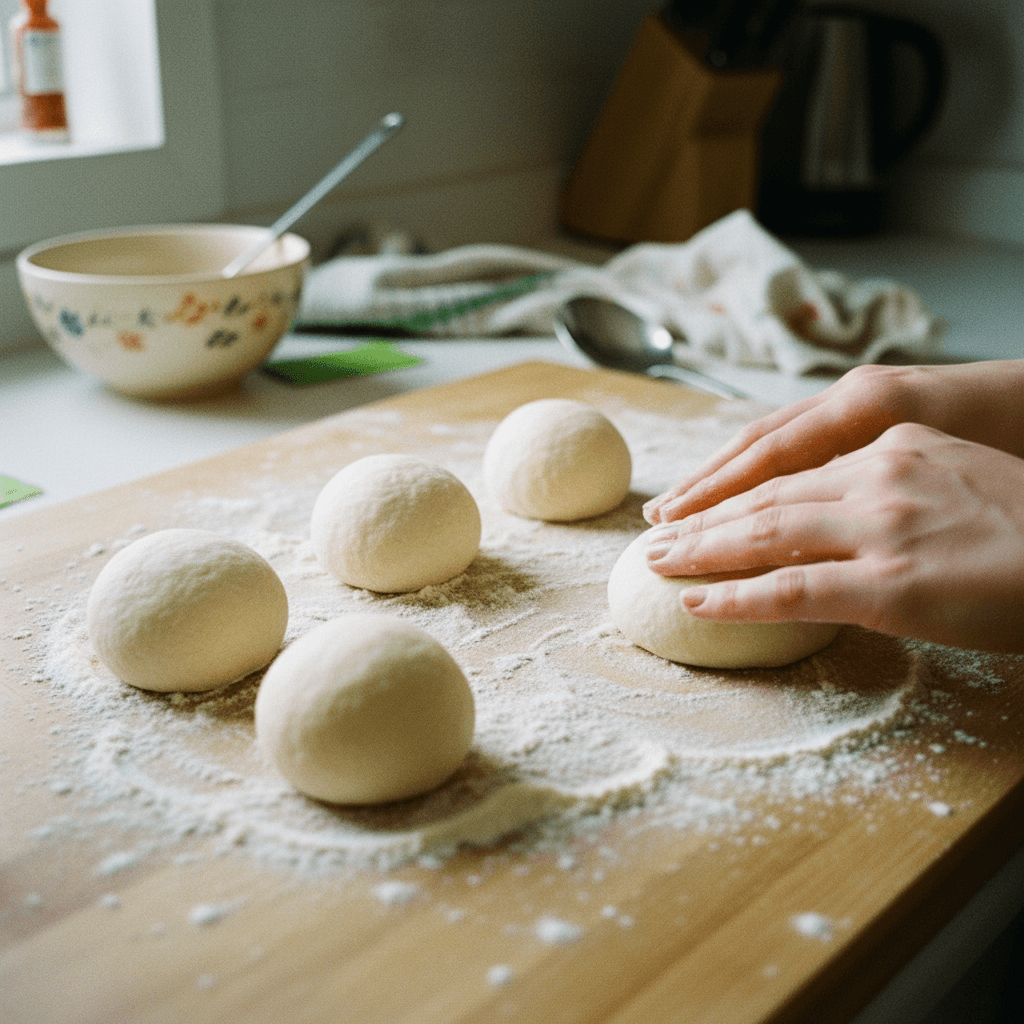
- 8
Cover the dough balls with a clean towel and let them rest for approximately 10 minutes. This allows the gluten to relax, making them easier to roll.
⏱️ 10 min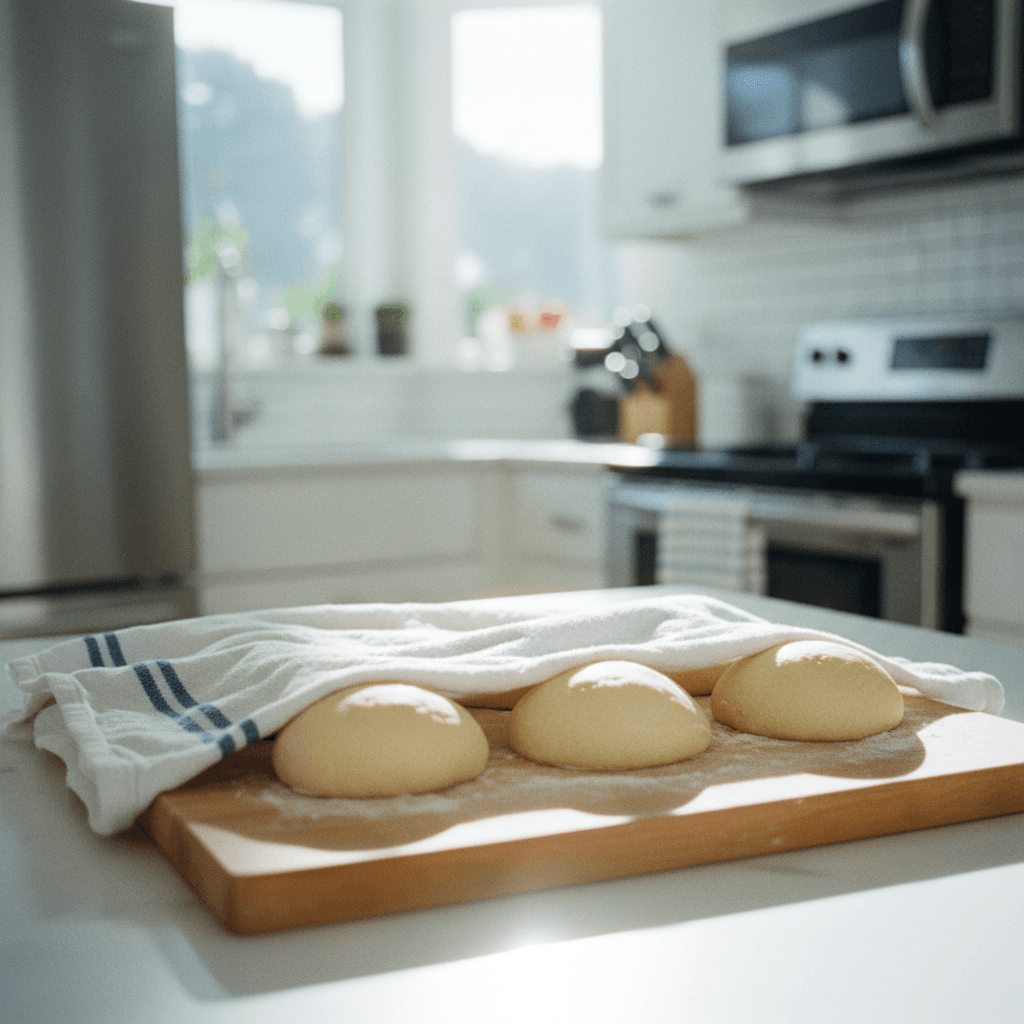
- 9
For each dough ball, first flatten it slightly with your palm. Then, using a rolling pin, roll it out from the center outwards into a circle about 4-5 inches in diameter. Ensure the center remains slightly thicker than the edges to prevent tearing when filled.
⏱️ 5 min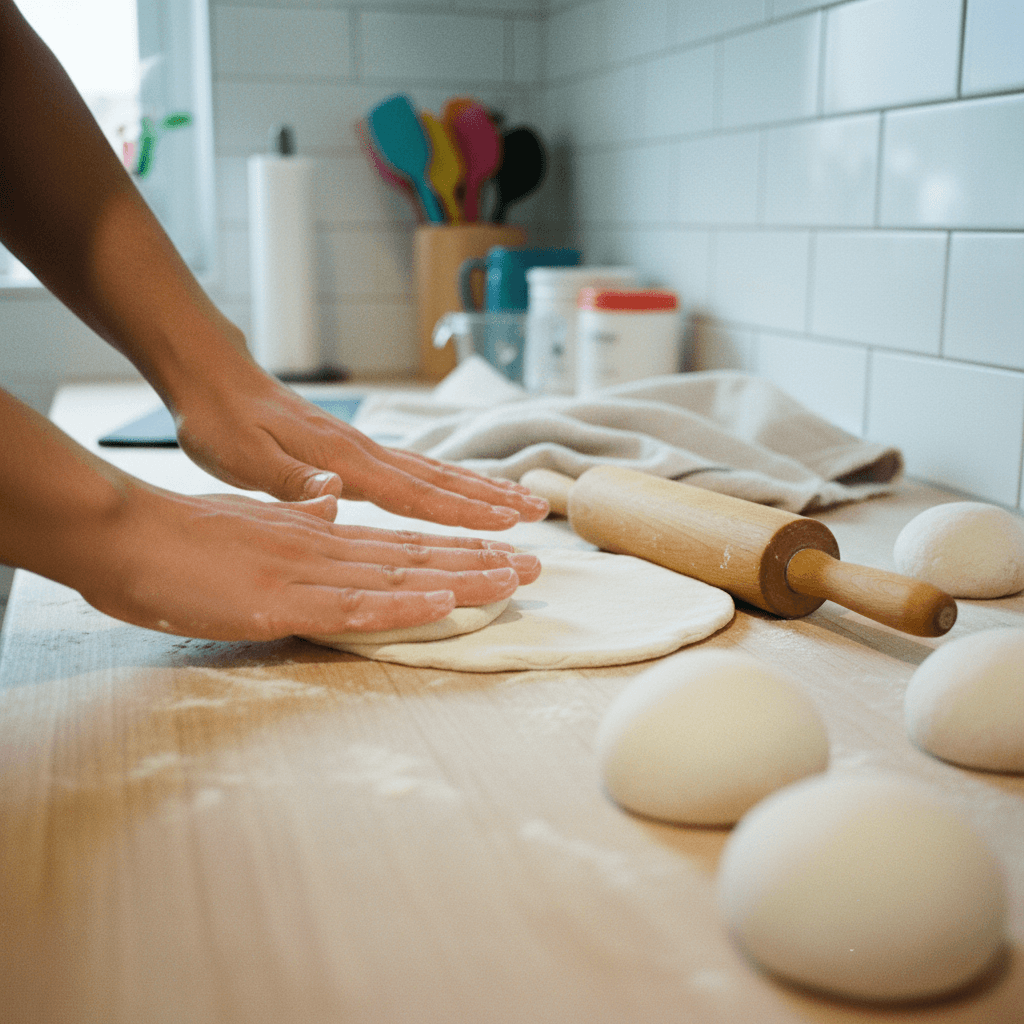
- 10
Place a generous scoop (about 2-3 tablespoons) of sweet azuki bean paste into the center of each flattened dough wrapper.
⏱️ 2 min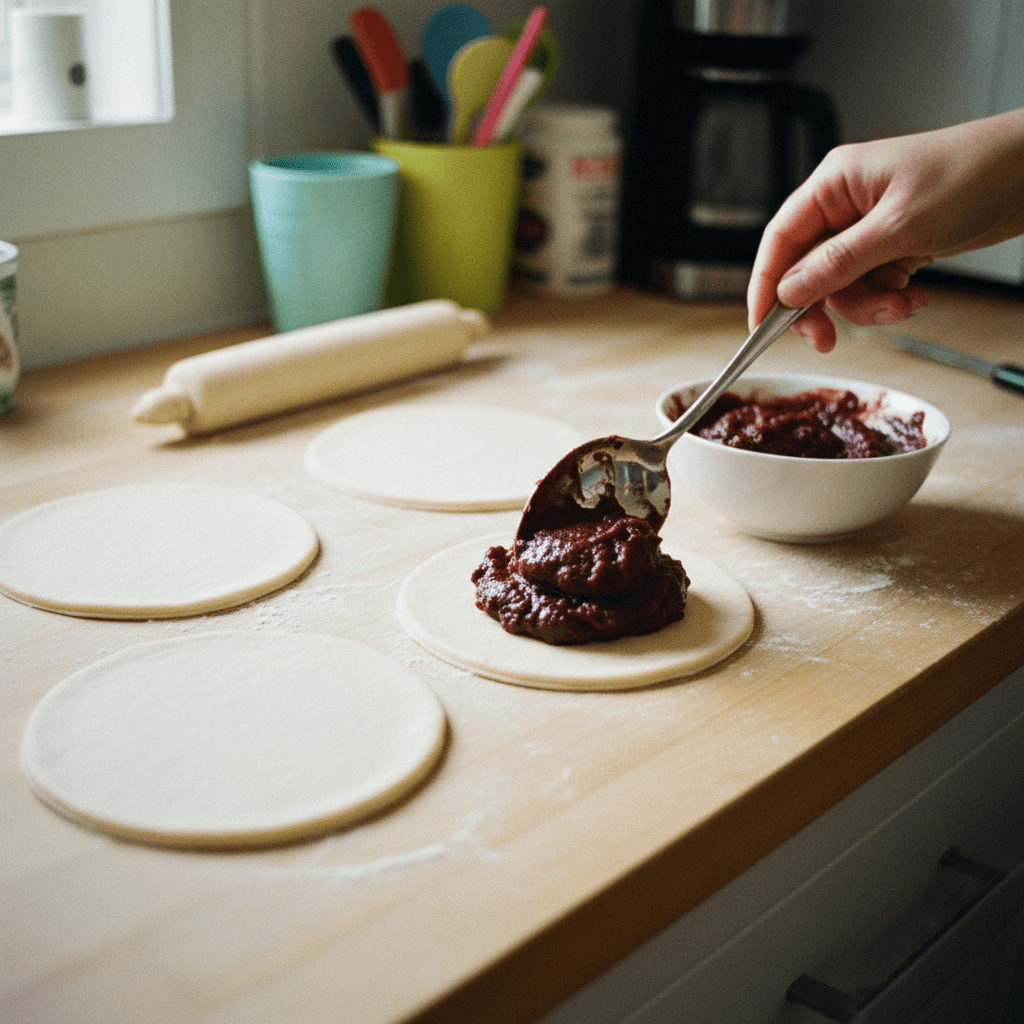
- 11
Carefully bring the edges of the dough wrapper up and around the filling, pleating and pinching them together at the top to seal the bun completely. Gently shape the filled bun into a more perfectly round form.
⏱️ 6 min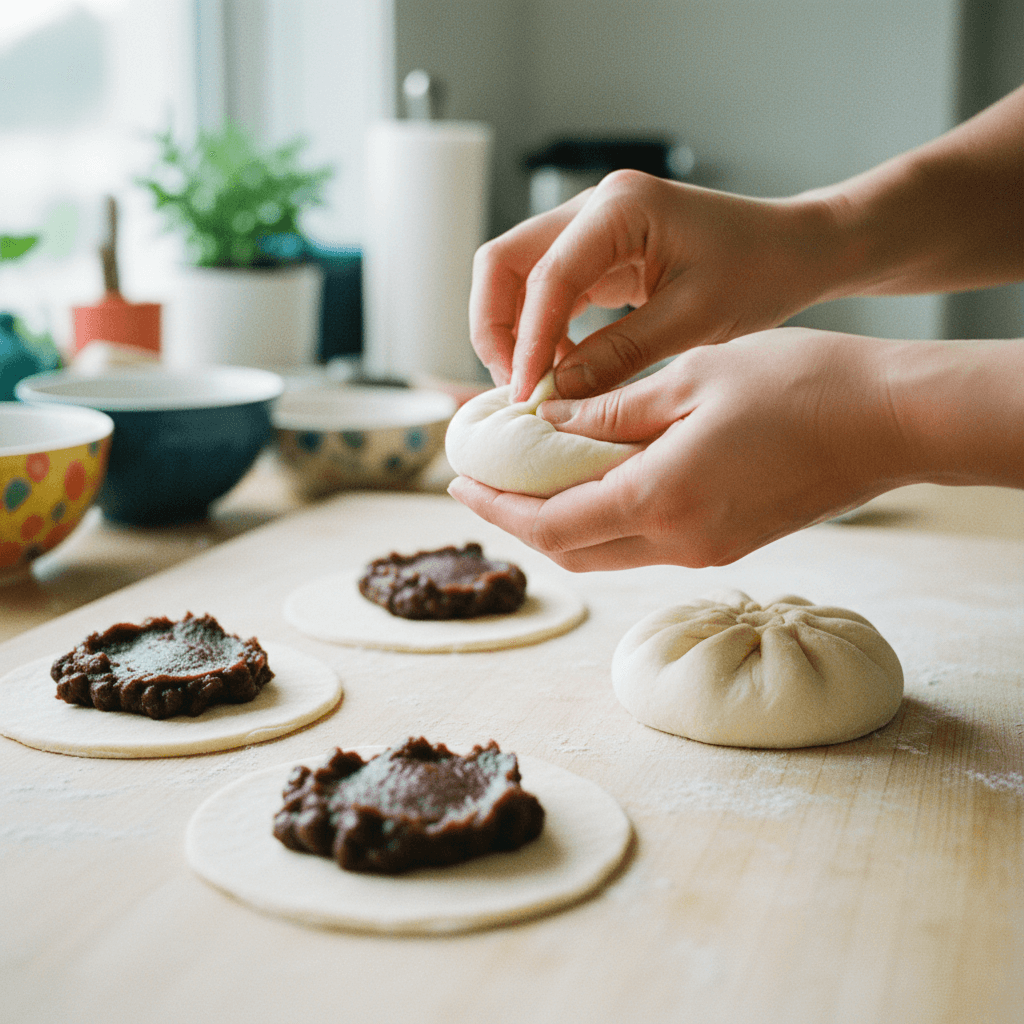
- 12
Arrange the filled buns on individual squares of parchment paper. Place them on a surface, cover loosely with a clean towel, and allow them to proof for another 10 to 15 minutes. This final proof ensures the buns will be extra light and fluffy.
⏱️ 15 min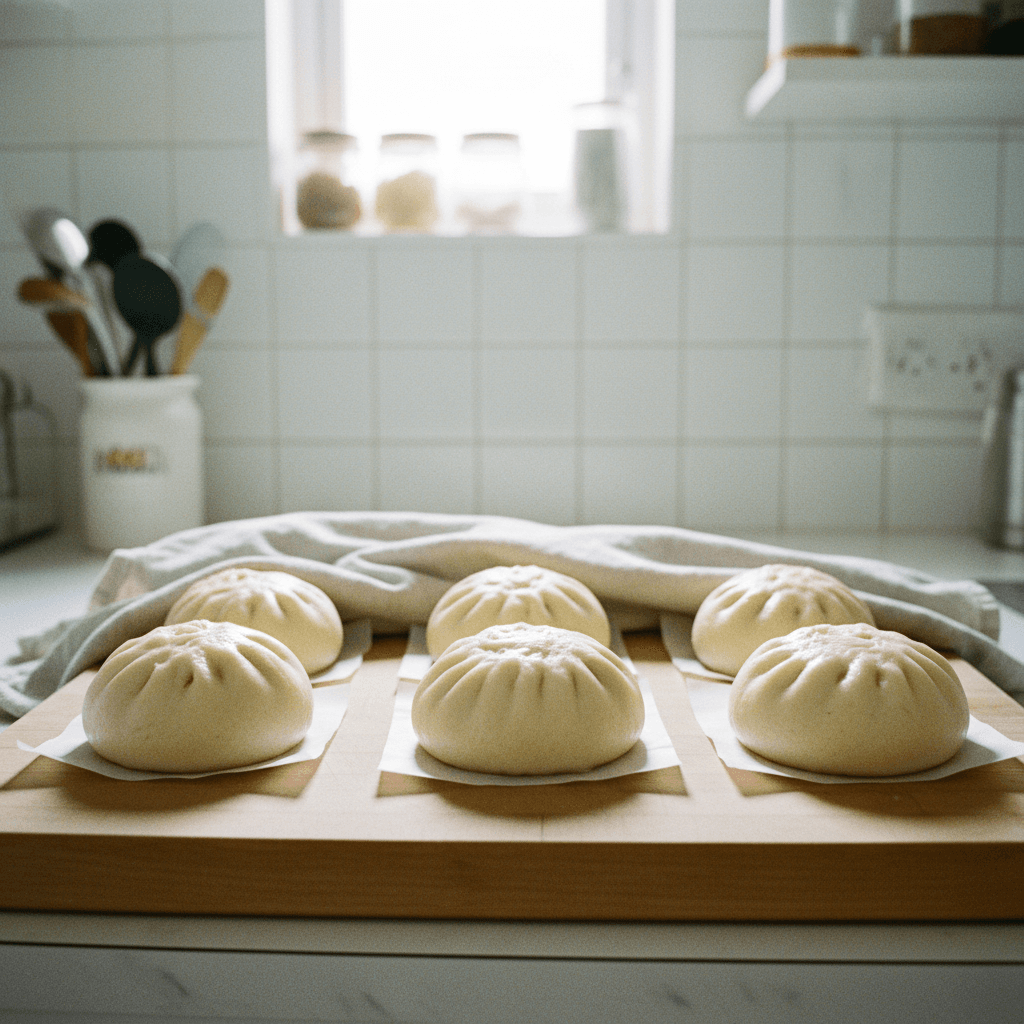
- 13
Prepare your steamer. Fill a pot with water and bring it to a boil. Place a bamboo steamer basket (or metal steamer) over the boiling water. Carefully place the proofed buns, still on their parchment paper, into the steamer basket, ensuring there is space between each bun for expansion. Do not overcrowd the steamer.
⏱️ 2 min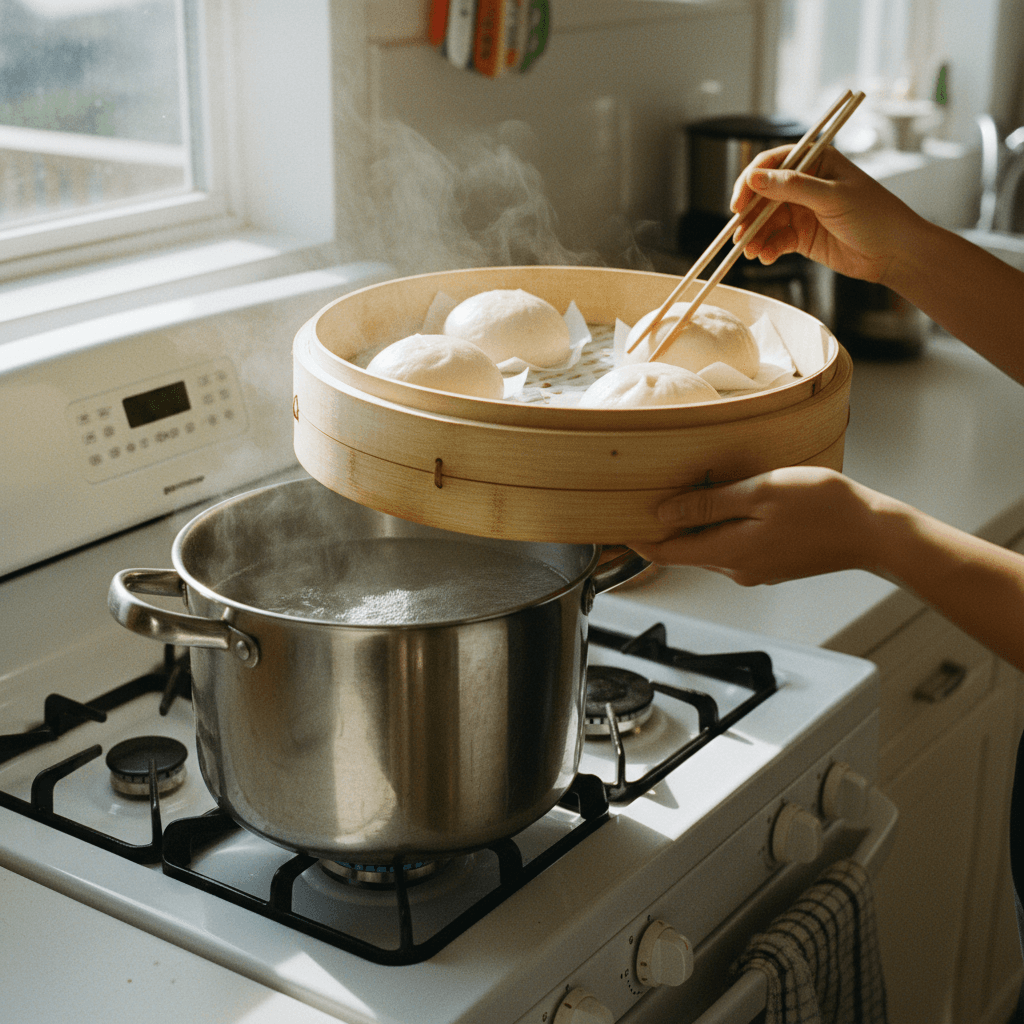
- 14
Cover the steamer and steam the buns for 10 minutes over medium-high heat until they are fully cooked, puffy, and soft like clouds. Do not lift the lid during steaming. Once done, turn off the heat and let the buns sit in the steamer for 2-3 minutes before carefully removing them to prevent shrinking.
⏱️ 10 min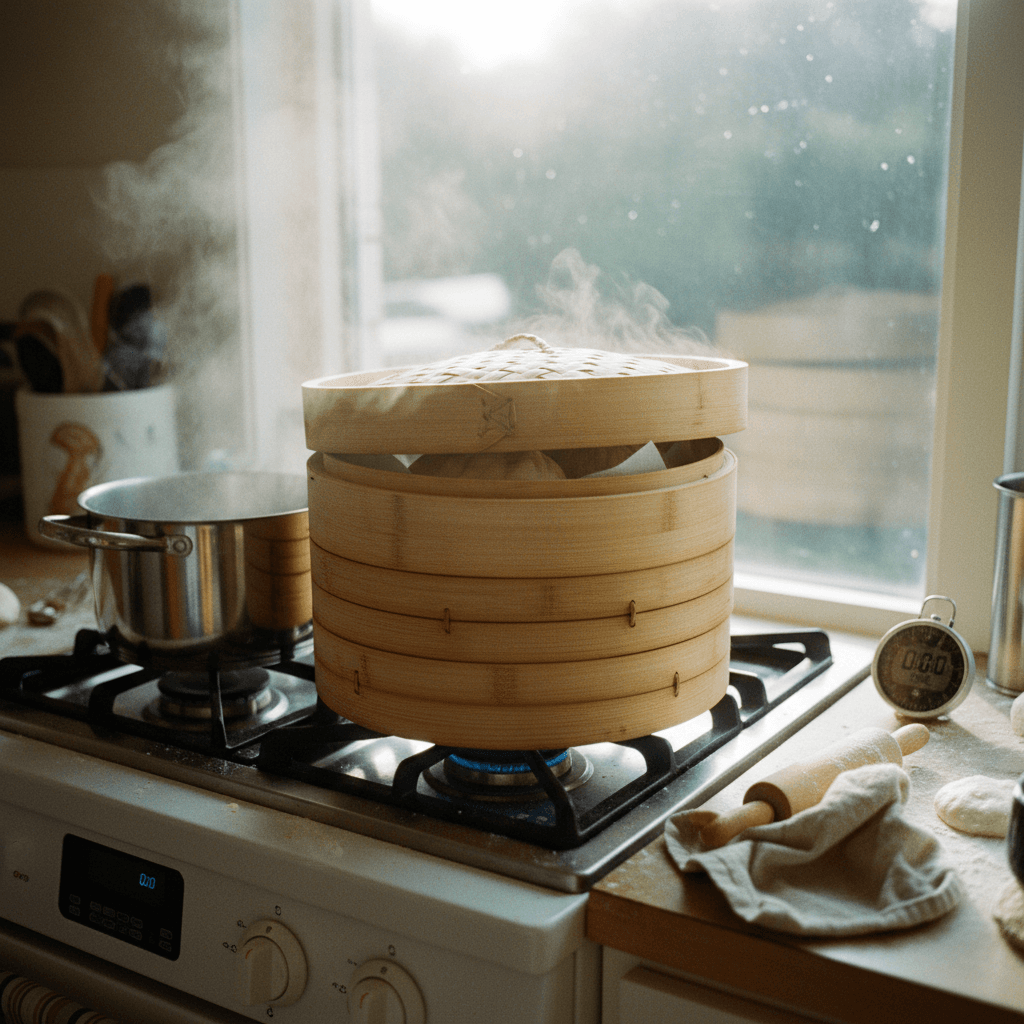
Kitchen Tools
Nutrition Facts (per serving)
Sweet Azuki Bean Bao (Steamed Red Bean Buns)
For the Dough
- 1/2 cup oat milk, warmed to 105-115°F
- 2 tablespoons granulated sugar
- 2 1/4 teaspoons active dry yeast
- 2 cups all-purpose flour
- 1 teaspoon baking powder
- 2 tablespoons vegetable oil
For the Filling
- 1 cup sweet azuki bean paste, store-bought or homemade
For Steaming
- 4 parchment paper, cut into squares or circles to fit steamer
Instructions
- 1
In a large mixing bowl, combine the warmed oat milk, granulated sugar, and active dry yeast. Stir gently and let the mixture sit for 10 minutes until small bubbles form on the surface, indicating the yeast is active.
⏱️ 10 min - 2
To the activated yeast mixture, add the all-purpose flour and baking powder. Mix briefly with a spoon or spatula until just combined. Then, add the vegetable oil and mix again until the ingredients roughly come together to form a shaggy dough.
⏱️ 5 min - 3
Transfer the dough to a lightly floured clean work surface. Knead the dough thoroughly for 8-10 minutes until it becomes smooth and elastic. It should spring back when gently poked.
⏱️ 10 min - 4
Lightly grease the mixing bowl. Place the kneaded dough back into the bowl, cover it with a clean kitchen towel or plastic wrap, and set it aside in a warm place. Allow it to proof for 45-60 minutes, or until it has doubled in size.
⏱️ 60 min - 5
Once the dough has risen, gently punch it down to release the accumulated air. Transfer it back to the work surface and knead it briefly for 1-2 minutes to further develop its texture and remove any large air pockets.
⏱️ 2 min - 6
Roll the dough into a long, cylindrical rope, approximately 1 1/2 to 2 inches in diameter. Divide this rope into 4 equal small chunks by hand or with a dough cutter.
⏱️ 3 min - 7
Take each small dough chunk and knead it individually for a few seconds to form a smooth, round ball. Place these dough balls on a lightly floured surface.
⏱️ 2 min - 8
Cover the dough balls with a clean towel and let them rest for approximately 10 minutes. This allows the gluten to relax, making them easier to roll.
⏱️ 10 min - 9
For each dough ball, first flatten it slightly with your palm. Then, using a rolling pin, roll it out from the center outwards into a circle about 4-5 inches in diameter. Ensure the center remains slightly thicker than the edges to prevent tearing when filled.
⏱️ 5 min - 10
Place a generous scoop (about 2-3 tablespoons) of sweet azuki bean paste into the center of each flattened dough wrapper.
⏱️ 2 min - 11
Carefully bring the edges of the dough wrapper up and around the filling, pleating and pinching them together at the top to seal the bun completely. Gently shape the filled bun into a more perfectly round form.
⏱️ 6 min - 12
Arrange the filled buns on individual squares of parchment paper. Place them on a surface, cover loosely with a clean towel, and allow them to proof for another 10 to 15 minutes. This final proof ensures the buns will be extra light and fluffy.
⏱️ 15 min - 13
Prepare your steamer. Fill a pot with water and bring it to a boil. Place a bamboo steamer basket (or metal steamer) over the boiling water. Carefully place the proofed buns, still on their parchment paper, into the steamer basket, ensuring there is space between each bun for expansion. Do not overcrowd the steamer.
⏱️ 2 min - 14
Cover the steamer and steam the buns for 10 minutes over medium-high heat until they are fully cooked, puffy, and soft like clouds. Do not lift the lid during steaming. Once done, turn off the heat and let the buns sit in the steamer for 2-3 minutes before carefully removing them to prevent shrinking.
⏱️ 10 min